Tornado Command and Staff College (TCSC)
CONTENTS1.1 INTRODUCTION The TCSC is one of the most useful resources available to the Tornado Commander. Below is the Introduction from the TCSC published in 1995 by the Tornado Command Associates. Please note that this resource has been recreated here as some players have been having trouble with the Help File utility that TCSC was created in. The TCSC is ? 1995 Tornado Command Associates.
Credits: TCSC was developed by FSFORUM members Basil "Sweet" Copeland, Eric "Cougar" Joiner and Heinz-Bernd "Bicycle Repairman" Eggenstein.
This Help file is designed around efficient application of wargame theory as it applies specifically to Tornado. It is not a substitute for Digital Integration's excellent flight manual for the simulation, but rather as a supplement to it. We expect this Help file to be subject to revision as feedback is recieved. This file is not sponsored or supported by Digital Integration or its designated Licensees.
1.2.1 Assigning Aircraft
Tip #1
Tip #2
1.2.2.1 Using the Command Window (Priority Target Finder)
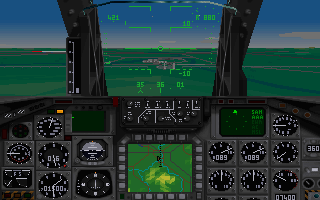
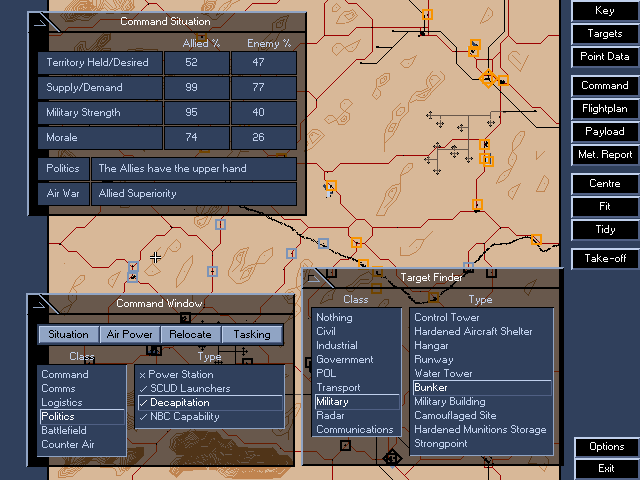
Your most important tool is the Priority Target Finder (PTF), which you access with through the Command Window. The PTF simulates access to processed intelligence. Visualize it as your personal intelligence staff. It is your key to a successful campaign. The PTF categorizes potential targets into one of six categories, as follows:
The manual gives a brief and adequate description of each type of target, so there is no need to repeat what you can learn easily from the manual. For more information on how to use the PTF to effectively select targets, see Strategies for Effective Target Selection and Using Explore Mode.
You should familiarize yourself not only with the PTF target categories, but with the Situation report available in the Command Window. This summarizes how the war is going in terms of four statistical parameters:
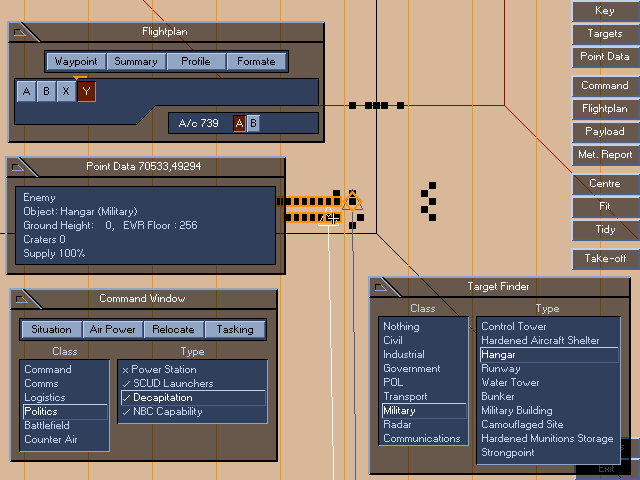
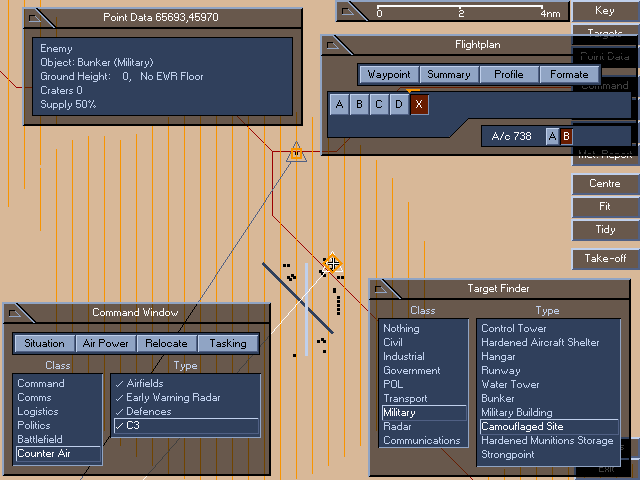
As helpful as the Priority Target Finder is at identifying important targets, you still need to use the Target Finder to select targets for assignment to flightplan waypoints. So once you will typically work with both the Command window and the Target Finder window open when developing flightplans. A good approach is to use the PTF first to identify potential targets. The PTF identifies targets by function, not type. For instance, a Field HQ will be a Camo Site as far as the Target Finder is concerned. So if you have selected a Field HQ as a target, to program that into your flightplan you will need to select the Camo Site category with the Target Finder. The target of interest will be indicated by a square Target Finder category indicator inside of a Command window PTF diamond shaped category indicator. Once you have the target scoped out this way using both the Command window PTF and the Target Finder, assign the target to one of your a/c in the usual way. Depending on how close your targets are for a given waypoint, you probably should be working with the Mission Planner map in 3x-6x magnification at this point. The smaller (3x) magnification is good for targets that may be a mile or two apart. Do not assume that you have to keep your targets close together. On rare occasions, it may even be advised to assign two planes (if you are flying 2 a/c flightplans) targets several miles apart in order to hit targets of strategic value. It is a waste of ordnance, for example, to assign a 2 a/c flight to take out both the radar dome and the associated bunker at an EWR site. Assign one plane to take out the radar dome, and then look for a Camo Site within a few miles of the EWR site. The 3x magnification is helpful for getting this larger view of the immediate vicinity. At this level, you may find two priority targets near each other, such as an EWR and a Comms site. The Target Finder category type with the most varied category functions in the PTF are Camo Sites and Bunkers. Camo Sites can be Field HQ, Comm Field Relays, Forward Dumps, or even combinations of these. Bunkers may be C3, Decapitation, and Rear HQ PTF categories. Learn to use the Target Finder in conjunction with the Command window PTF. And if the target is a Main Depot or HAS, do not forget to use Explore Mode to scope out the best target for possible secondary hits.
When attacking targets in a city, make sure to minimize the risk of collateral damage to civilian installations. For example, if you are flying in the Desert Storm theatre, make sure you don't hit a mosque! You can also use the Target Finder (or the Point Data Window) to make sure that no obstacles like tall smokestacks or office buildings are in your flight path.
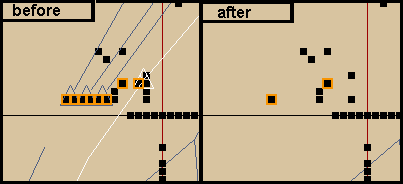
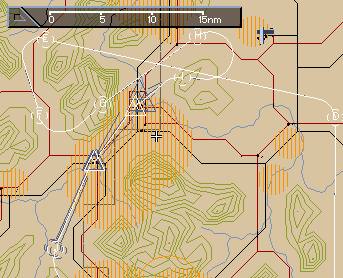
Seemingly useless (who wants to bomb "nothing"?) and not discussed in the original manual, this is a very important feature of the TF. When you select any of the other target categories, new target waypoints can only be positioned atop of a target of the selected type, which is usually what you want. But there are two situations when you do want to position a target waypoint atop of "nothing": 1) To position a target waypoint for an indirect ALARM attack on a mobile anti aircraft unit. 2) To put a target waypoint in the middle of a cluster of several 'soft' targets like hangars, POL tanks and military buildings. Because these structures are not hardened, they don't require a direct hit and often you can destroy several structures in a cluster with a single package of iron-bombs.
The section of Mission Planner map shown above illustrates a four aircraft attack on a military base using this technique. The technique of destroying many targets with a single package will allow you to win a campaign more easily or alternatively will allow you to carry more ALARM missiles to decrease the risk of being killed during the campaign.
After completing the 'design' of your flightplan, you might want to look for additional targets of opportunity along the last few legs of the flightplan that can be destroyed by strafing, e.g. camouflaged sites. It is a waste of firepower to return to your home base without having fired on a camouflaged tent nearby, provided you have enough fuel left and there are no ground-to-air or air-to-air threats nearby.
This is only useful when you are in danger of loosing a campaign. In this case you might consider flying ADV missions yourself (the computer controlled ADV pilots don't perform very well!) to protect allied assets. You will use the Priority Target Finder, the Target Finder and the Point Data Window to identify installtions that you can't afford to loose.

Go after as many Camouflaged Sites as possible.
Use the Point Data window.
Look for hangars.
Take out the bunkers.
When all else fails.
Think strategically rather than tactically.
Tornado's Explore Mode, when used in conjunction with the Command level Mission Planner, is an excellent aid in target selection. When you select the Explore option, the screen changes to show you a full-screen window onto a map of the current War Zone. When you hit either the SPACEBAR or ENTER key, the map disappears and you find yourself in TDO's three-dimensional game world. Using the mouse or joystick, you can move around in this game world and inspect the current state of the game world objects. Look upon this as 'real-time satellite intelligence.' As explained below, you can use this intelligence to enhance the effectiveness of your strike missions.
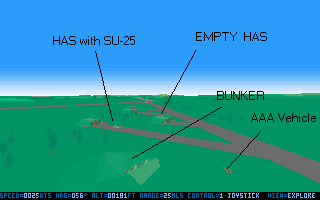
 Explore Mode is best used as an adjunct to the Mission Planner. Suppose you are planning a strike on an enemy airfield. Probable targets are Hardened Aircraft Shelters and Hangars. You've zoomed in the Mission Planner map to the 6X scale so you can identify and target individual Hangars or HAS with the Target Finder. But which Hangars or HAS should you target? That is where Explore Mode proves its worth. Position your cursor over the Mission Planner map just south of the area that you are targeting and select Explore Mode.
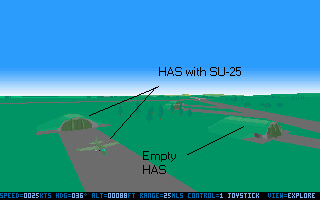 Hit the SPACEBAR or ENTER key and drop into the 3D game world. Use the mouse or joystick to 'fly' over the target area and look for possible targets. You will often find HAS and Hangars with A/C on the tarmac nearby. Rather than target any HAS or Hangar, target those with A/C nearby. You will often get secondary hits when you strike such targets.
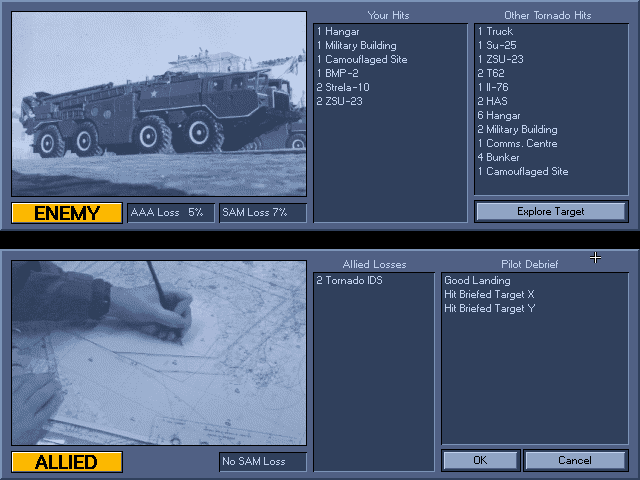 If you view the Mission Results Screen above (click on the hotspot near the top of this page) you will see the results of a mission that made effective use Explore Mode in selecting targets. In addition to the primary X, Y and Z targets selected for this mission, the mission was credited with the following secondary hits: 1 BMP-2, 2 Military Buildings, 1 Truck, 1 SU-25, 2 T62, and 1 IL-76! Since the number of hits per mission seems to affect the progress of the campaign (the more the better!), Explore Mode is a tool you will want to make extensive use of. One final tip with respect to the use of Explore Mode in selecting targets. One of the Priority Target categories is 'Main Depots.' When you zoom the Mission Planner map in on the Priority Target diamond for a 'Main Depot,' you will usually find that it is just an intersection. But it will often be near a military complex of hangars, military buildings, bunkers, and maybe a rail siding. Use Explore Mode to select hangars or military buildings with vehicles nearby. For an even more spectacular mission, look and see if there is a train off-loading nearby. Even though there is not a Target Finder category for such a target, you can assign it as a target to one of your A/C. Use Explore Mode to get a good fix where on the rail siding the train is sitting, align the flight path of the A/C directly over the rail track, and target it with BL755 cluster bombs. If all goes well, you'll get credit for 4-5 rail car hits!
1.3.1 Threat Evasion
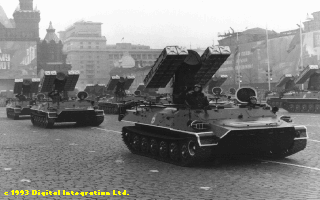
In the initial release of Tornado, SAM hits were almost universally fatal. This was not realistic, and DI responded to user feedback and modified the way Tornado models SAM hits. On the off chance that you are using Version 1.0a of Tornado, the first thing you want to do is update your version! Subsequent versions change the probability of a SAM hit of being instantly fatal. You are still subject to a high-threat environment, but now when you are hit there is at least some probability that the hit will merely damage your a/c. Occasional hits are still instantly fatal, but that is no longer the usual case (unless you fail to take any of the normal or prudent steps toward threat evasion). In addition to changing the way Tornado models the destructiveness of SAM hits, an audible missile warning cue was added. You are now warned of an impending missile strike. When you hear the missile warning, you better be looking for the sucker and dumping chaff and flares! For low-level attacks through heavily defended sectors, the following tips have been found effective in reducing the risk from SAM's and AAA. 1) Fly FAST (and low), i.e. at something greater than 600 kts. This will reduce the probability of being hit. 2) Fly directly at the SAM launcher. Head on and close in, you will usually see the missile arc harmlessly overhead (except at night, and even then you sould realistically be able to see a SAM launch, but Tornado doesn't implement this), and don't even need to waste chaff or flares on it. If it has a lock, though, you will see it coming straight at you and know to pump flares and chaff! (If it is night, you should assume that all head on shots are locked on you.) For head on shots like this, dumping chaff and flares at just the right moment, combined with flying fast and low, is often enough to decoy the missile without requiring evasive action. Most serious SAM hits come from missiles at an angle of attack off your nose (e.g. from the side). In this case, standard evasion tactics would require you to turn into the missile path and pump chaff and flares. This often works like it is supposed to, but if you are seconds from a laydown drop it may be too late to get back on course and the SAM has scored a mission kill even if you have evaded it. At least as far as Tornado gameplay is concerned, you are more likely to complete your mission and decoy SAM launches by planning your strike right dead center through known SAM sites and hope that chaff and flares decoy the missile without requiring you to jink all over the place! 3) Turn on ECM. Tornado models the effect of ECM by increasing the amount of time it takes a SAM radar to get a fix on you. This means that with ECM on, the number of SAM's launched as you traverse a defended site should be less than with SAM off. It does NOT affect the probability of being hit once the SAM is launched. So with ECM on, you still need to use standard tactics to avoid being hit once a missile is launched. 4) Learn to take out SAM lauchers as you approach a target. With skill, this can be done more than 50 percent of the time. This probably won't prevent all missiles from being launched, but if successful the SAM unit won't get off more than one or two, and you can breath a little easier as you pass over the target and egress the site. Generally...if you have planned your attack dead center through a defended site, at 600+ kts you will probably get your first RWR alert about 30 seconds out from the target. You should be flying at that point with ALARMS cocked and ready to go, and with AFDS in track mode. But, before you pull the trigger, look at the RWR and determine whether the threat is a combined SAM/AAA threat. If so, firing an ALARM at the first warning indication will usually take out the AAA unit rather than the SAM unit, and the ALARM will not automatically lock on to the SAM unit until the ALARM has hit the AAA unit. You don't have time to wait. When you get the first warning, you can increase the probability of hitting the SAM unit by turning off the AFDS (hit the ESC key) and jinking slightly in the direction of the threat before you fire. Then, once you fire, immediately engage the AFDS in track mode again to get you back on track toward your target. Learn to keep ALARMS armed until you are less than 10 seconds from laydown. With practice, you can learn to disengage ALARMS, change to your target bomb loadout, and rearm for laydown in just two or three seconds. As long as you are able to stay in AFDS track mode, you don't have to worry about controlling the direction of flight while you do this. 5) Take advantage of terrain masking opportunities. While flying dead center through SAM sites should take precedence over coming around the bend at an off angle from the site, there are times when you can effectively use terrain masking opportunities. A good example is where you come in head on with a low hill or rise to pop over just before you reach the site. Instead of fearing SAMS, look upon SAM threats as a challenge to master. Consider a standard loadout of 6 ALARMS for your a/c (not your wingmen) and take on the challenge and responsibility of defense suppression in conjunction with X and Y target responsibilities. Let the mark of a good mission be that you hit both your X and Y targets, AND took out 4-6 SAM or AAA units while doing so!
1.3.2 More About Alarms and SAM Supression The best way to avoid being hit by a SAM or AAA is to avoid flying within the range of these threats. But of course, sometimes you can not avoid this, e.g. when there is SAM and/or AAA near a target and loft bombing is too inaccurate for the target. If you are eluminated by a SAM, engage ECM and start dropping chaff, this will delay the launch of a SAM missile. See the section "Terrain Masking" for useful information about avoiding being tracked by a SAM unit. The next best way to deal with SAMs is to take them out with ALARM missiles. The computer controlled aircrafts can only launch ALARMs in indirect mode, while you have the choice between direct and indirect delivery. Using wingmen to saturate the target area with ALARMs in indirect mode will reduce the risk to your flight dramatically, but on the other hand, every package of ALARM missiles loaded will reduce the number of targets you can hit with iron bombs, and thus reduce the impact your attack will have on the enemy. You will have to balance the mainly defensive use of ALARMs against offensive bombing, depending on how well you are doing in the campaign. When using wingmen to launch ALARM, make sure you arrive in the target area at least 30-45 sec after your wingmen so that the ALARMs will have found their targets by the time you arrive. Beginning with version 1.0d of Tornado, ALARMs launched in indirect mode will not just cut their chutes and drop on their targets, but will re-ignite the rocket to kill the enemy more quickly. This makes them much more useful. You should also position the ALARM target waypoints as close to the center of the SAM range circles on the mission planner screen as possible. See the section describing the "Target Finder" for more information about positioning ALARM target waypoints. When you load ALARMs on your aircraft, you will use them in direct mode most of the time, because you can kill specific threats easily by pointing your Tornado's nose in the direction of the threat as indicated by the RWR and the target marker on the HUD. But in some rare situations, an indirect launch will be an alternative worth considering. Select the examples above for further detail.
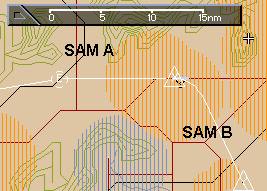
First, memorize the exact position of the SAM unit you want to attack, or use a tool like TMF (see section on utility programs) to print a map of the area. After taking off from your airfield, you'll probably have some time left before entering enemy air space. Get into the navigator's seat. Switch one of the big TAB displays to MAP mode. Using the mouse and your memory or a printed map, scroll the map to the position of SAM B. A left button click will designate this position as waypoint "T". Leave the map centered at this waypoint. Now switch back to the front seat. When you are approaching the target area, arm the ALARM package in indirect mode. Be prepared to reconfigure it to direct mode later to kill SAM A. When you fly a JP-233 mission, you might want to carry "indirect" ALARMs in your 2nd package and direct ALARMs in your third package. Periodically check the back seat. The number in the lower right corner of the map display indicates the distance to the point in the center of the map display, in this case the "T" waypoint! When you are within range for an indirect ALARM launch (9-10 nm): push the "T" key to make the "T" waypoint your current waypoint. Immediately, launch the ALRAM, and after that immediately press the "N" key to switch back to your pre-planned flightplan. This way you can launch an ALARM without having to ruin your line-up with the enemy runway. When flying within the range of the SAM, use ECM and chaff to delay a SAM launch. By the time the SAM is ready to engage, your ALARM will probably be on it's way to take it out.
Many TORNADO simulator pilots will dismiss the idea of carrying large numbers of ALRAMs and argue that this will make it more difficult to win a campaign because of the reduced iron bomb payload. The validity of this argument depends on what your definition of "winning a campaign" is. If you consider a campaign won even if you had to repeat a few missions (e.g. because you were shot down by SAM/AAA), then this line of argumentation is accurate. If you take a "purist's" viewpoint and define a "win" as the campaign being completed successfully AND the simulated pilot surviving the campaign, then SAM/AAA suppression will be more important. Seen from the perspective of an individual pilot, the second definition is more realistic than the first.
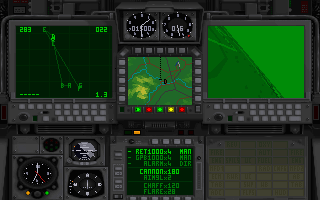
The concept of stealth, or sneaking up on your enemy, is as ancient as the Ninja assassin. Today the word "stealth" connotes the use of radar avoidance through high technology radar absorbant materials, advanced electronics, etc. In Tornado, the concept is applied more simply. Radar and visual aquisition of inbound aircraft is all "line of sight." That means you must be able to look at the object in a straight line without an obscuring barrier. Radar, like the eyeball, can't see around an object, whether that is a building, mountain or the curvature of the Earth. Moving objects appearing from behind obscurations in the natural surroundings are very hard to detect and harder to react to. Just like the child that chases a ball into the street from between parked cars, we seek to appear at very high speed instantly over the target, deliver ordnance and depart the target before the enemy can engage radar directed defenses, such as SAM or AAA. This is natural stealth at its best. In planning aircraft routes inbound and outbound from a target, the Theatre commander must seek to protect his air assets to a high degree of expediency without degrading the attackers ability deliver ordnance. Such things as weather, the type and number of target air defenses, availabilility of friendly CAP, the presence of enemy CAP, the counter air threat enroute , the primary weapon delivery requirements vs. the amount of ALARM carried, among other factors, play into the equation of mission masking. Terrain masking means to take maximum advantage of natural hills and valleys in order to hide your flights of Tornado Gr.4 aircraft. On the most basic level, say at level one campaigning, this means placing your flight path within valleys and behind mountains enroute. This basic concept continues with advancement to level two, except that more aircraft are involved. Terrain masking, in addition to speed and weather are also your main defense against CAP aircraft. Remember: when acquired by enemy fighters there is only one prudent solution...RUN like hell. The Tornado is very, very fast on the deck. With sufficient terrain to hide behind and 600 kts of airspeed, many times you can outrun a fighter. Also it is important to remember that you can carry ALARM missiles for direct defense against SAM and AAA threats. However the maximum you can carry is 6 with any decent amount of iron ordnance. Use Terrain to hide from SAM batteries and AAA where possible. Plan your routes to targets so that, if at all possible you appear from behind an obscuration no more than 15-20 seconds before delivering ordnance. Be ready to instantly fire ALARM upon acquisition then switch to laydown mode for the iron delivery. It is assumed that if multiple aircraft are inbound to nearby targets, that divergent routes have been selected in order to confuse the enemy gunners. A note on Desert Warfare... For obvious reasons, fighting in the desert is different than the mountainous regions of Europe. Its basically like flying over a lumpy billiard table. There are NO trees, and very little in the way of hills in the Kuwait region. (Parts of Saudi Arabia are mountainous but not within the boundaries of theODS theatre.) The best one can do there is to take some advantage of the dunes in the sand. This is valid for shielding approaches to some targets and worthy of note. As an interesting anecdote, Tornado Gr.1 crews found it rather nasty when they first attempted nape of the earth flying in the desert during the gulf war. The Radar altimeter based terrain following system could not "see" sand dunes and several times Gr.1 aircrews almost met a sandy death....Since our plane is an advanced Gr.4, we are not encumbered by this. The axiom to remember: If the enemy can see you he can kill you. Use the natural surroundings to minimize the length of the airshow...then leave an iron souvenir as a fabulous parting gift.
A word about weather....

Tornado does an excellent job of modelling the heavy, inclement weather patterns common in Europe. The aircraft in reality was designed for this environment. The IDS variant Tornado is equipped with a terrain following radar that allows it to fly as close as 200 ft. to the ground in any terrain. This facility is somewhat limited by speed and risk is indicated on the Aircraft B threat/risk indicator. The terrain following radar and the excellent autopilot and targeting systems allow the Gr.4 Tornado to fly IFR attack runs in any weather. Having said that, it is to be remembered that heavy weather is your friend in Tornado. In real life, when an enemy is faced with the instant presence of low flying, fast movers inbound from multiple directions, targeting will revert almost immediately to the Mk 1. eyeball. This is then followed shortly by an attempt to use electronic targeting to pick out the bogies. It is in this short timeframe, that we seek to inflict our damage. Heavy weather, coupled with a well planned attack, will serve as an additional cloaking device, minimizing the enemies ability to see you. The simulation further adds to the benefit by grounding all SAM missiles in foggy conditions. These two factors allow you to use weather to your advantage in planning aggressive offensive battle action. Tornado models the following conditions: Clouds, Fog and Wind. These are coupled with various daylight conditions obviously connected to the time of day the mission is planned. Each of the conditions has its benefits and limitations. Clouds: Clouds in Tornado are mostly eye candy. However it is well to remember that they DO NOT MOVE. This is important in planning LGB attacks from medium altitude since a target obsured by clouds can't be laser designated. There have been several ocassions where I had to resort to dive bombing with "dumb" LGB's when faced with a cloud obscured target. The Tornado Desert Storm add-on package not only teaches this techique, there is a single mission designed around practicing this. Fog: Fog is a major ally in Tornado. As indicated previously, Surface to Air missiles do not fly in fog. This means that you can use fog as an opportunity to attack heavily defended targets or use modes of attack that are very dangerous to use otherwise. I use fog as an ideal time to make JP233 attacks on airfields. The Tornado is subject to heavy ground fire when flying straight and level over open airspace in the JP233 attack mode. Fog allows you to somewhat abate the ground fire by avoidance of SAMs. Remember: The AAA still can kill you regardless of the weather. Therefore target your ALARM missiles to AAA sites, instead of SAMs on missions fought in fog. Wind: Wind chiefly is a debilitator. It causes LGB dropped from medium altitude to miss lased targets and makes landings more difficult. In command mode, pay attention to windage in making decisions to relocate aircraft to different bases. Landing in cross winds with 25 knot gusts is extremely difficult. Flying heavier and faster approaches and crab the aircraft on approach. Consider the prevailing wind when deciding on relocation airfields in order to minimize the cross windage. The LGB problem is handled by dropping from a lower altitude (say 18,000 ft instead of 23000) , dropping at least two weapons approximately 5-7 seconds apart on the same target (in case one misses) and not being afraid to make two passes over the target. In reality, two passes is NEVER appropriate, but in this simulation, when the Allies have air superiority, you can do it. The AAA and SAMs can't reach you above 16000 ft. and LGB missions are not to be planned when enemy CAP flights are present. Ideal attack conditions in Tornado are therefore the worst weather you can imagine. When the daylight fighter drivers are snugged up with a pint o' heavy, the Tornado pilot can inflict the most damage...Cold, rain, fog, night...a perfect night for flying...Remember, the best way to kill a Su-27 is on the ground!
1.4.1 Utilities
Title: Tornado Keyboard Mapper (TKM) V1.02
Description: TKM is a memory resident program that will remap some of TORNADO's keyboard commands. It was written after the (somewhat clumsy) author ejected by accident several times by hitting CTRL-E instead of CTRL-R (radar off). The source code for this tool is available separately from the author so that programmers can customize this tool.
Requirements: about 2KB free conventional memory in addition to TORNADO's memory requirements. PKUNZIP required. The source-code edition requires Borlands TASM and TLINK to recompile.
Description: TLE is a simple tool to edit logfiles of Tornado pilots. You are able to change the Rank, Status (Active, KIA, KIT, POW, MIA, DEAD), name, and mission statistics. You can also make a pilot "immortal" (like GrpCpt DeFault), and you can 'clone' pilots. This tool can be used to correct bugs in the promotion mechanism of several versions of TORNADO. It can also be used to 'undelete' pilot logbooks that were erased by accident or by a bug in Tornado. Requirements: no special requirements, PKUNZIP required. How to get a copy: via CIS: GO FSFORUM, library #8 (Modern Air Combat), TLE.ZIP
Description: TMF is a set of tools that will allow you print screen shots of Mission Planner screens (like those contained in this help-file) to a black and white printer (see the Requirements section for details) without having to exit from the TORNADO program (like "faxing" maps to the pilots).The many display features of the Mission Planner will allow you to produce maps with different scales and level of detail.
A few applications for maps:
Activating and deactivating the time compression is done via hot-keys. TTC is not really a TORNADO specific program, so it may allow you to use "Time Compression" in other games as well. It is very well programmed, for example it will not influence the real-time clock of MS-DOS.
Requirements: About 4 kB free conventional memory in addition to TORNADO's requirements. PKUNZIP required.
1) Payload changes are not properly restored when you resume a saved game. You can prepare a Command level mission assigning waypoints, targets, and flightplans to your a/c, and save the game should you choose to exit the mission planner before actually flying the mission. When you resume the game, your flightplans will be restored properly. But if certain payload changes are not restored properly. Changes to the "-" loadout, e.g. dropping the Sidewinders and adding ALARMS, are not restored: the "-" loadout reverts to the Sidewinder default loadout. Changes to the fuel loadout are also not restored properly. So, when resuming saved games, ALWAYS check your payload before starting your mission to see if the loadout is what you want. If you routinely substitute ALARMS for Sidewinders, you'll need to go back and do this again before you start your mission. 2) The wind direction of saved games is not handled properly. When you exit a saved game, and then resume it, the wind direction has changed. This will change the crosswind vector and can mess up a carefully planned flightplan, sometimes requiring you to totally reverse your landing direction. Fortunately, the wind direction changes are not random; they rotate counter-clockwise. So if you don't get too impatient, you can exit and restart the saved game repeatedly until the wind direction gets back to something approximating the original wind direction. You can even use this "feature" to minimize the difficulty of strong crosswinds when on those days the wind is blowing at 25 knots: just exit and restart the game until the wind is mostly a headwind. End Note: adapted to HTML format by Frankie Kam (March 2016) |
||||||||||||||||||
|
|